Showing posts with label chocolate. Show all posts

Friday, 17 October 2014

The Ultimate Hot Chocolate

Photo credit: Megan Gunnell
I don't know about where you are, but in the lovely city of Oxford, the days are getting shorter, there is a definite chill in the air, and woolly jumpers have become part of my daily attire. I think I'm in "Autumnal Denial", as I've been trying to ignore the fact that winter is coming. 
Photo credit: Anne Dickens
 In Oxfordshire, we've just had 2 days of grey, drizzly, mizzly, rain, leaving me feeling like hibernating for the next 6 months until Spring comes around again. 
Photo credit

Credit: Pinterest
Although the idea of months of wet, cold winter leaves me with a sinking feeling as I have to say goodbye to the warmth of the summer sun, one of the best things about autumn and winter is the chance to snuggle up indoors and revel in lots of wonderful comforting things - like hot chocolate! 

Credit: Pinterest


After picking up the little one yesterday, we were both in need of an after-school treat, so I whipped up some of my Ultimate Hot Chocolate. 
It's creamy, smooth, and totally luxurious... and I promise you it will be THE best hot chocolate you have ever tasted. 


Credit: Pinterest
You can make changes to this recipe based on what you have available in the kitchen or based on how intensely chocolatey you like your drink. But it's really so easy, that however you make it, it's going to be gooooood! 

The Ultimate Couva Hot Chocolate (makes 4 mugs)
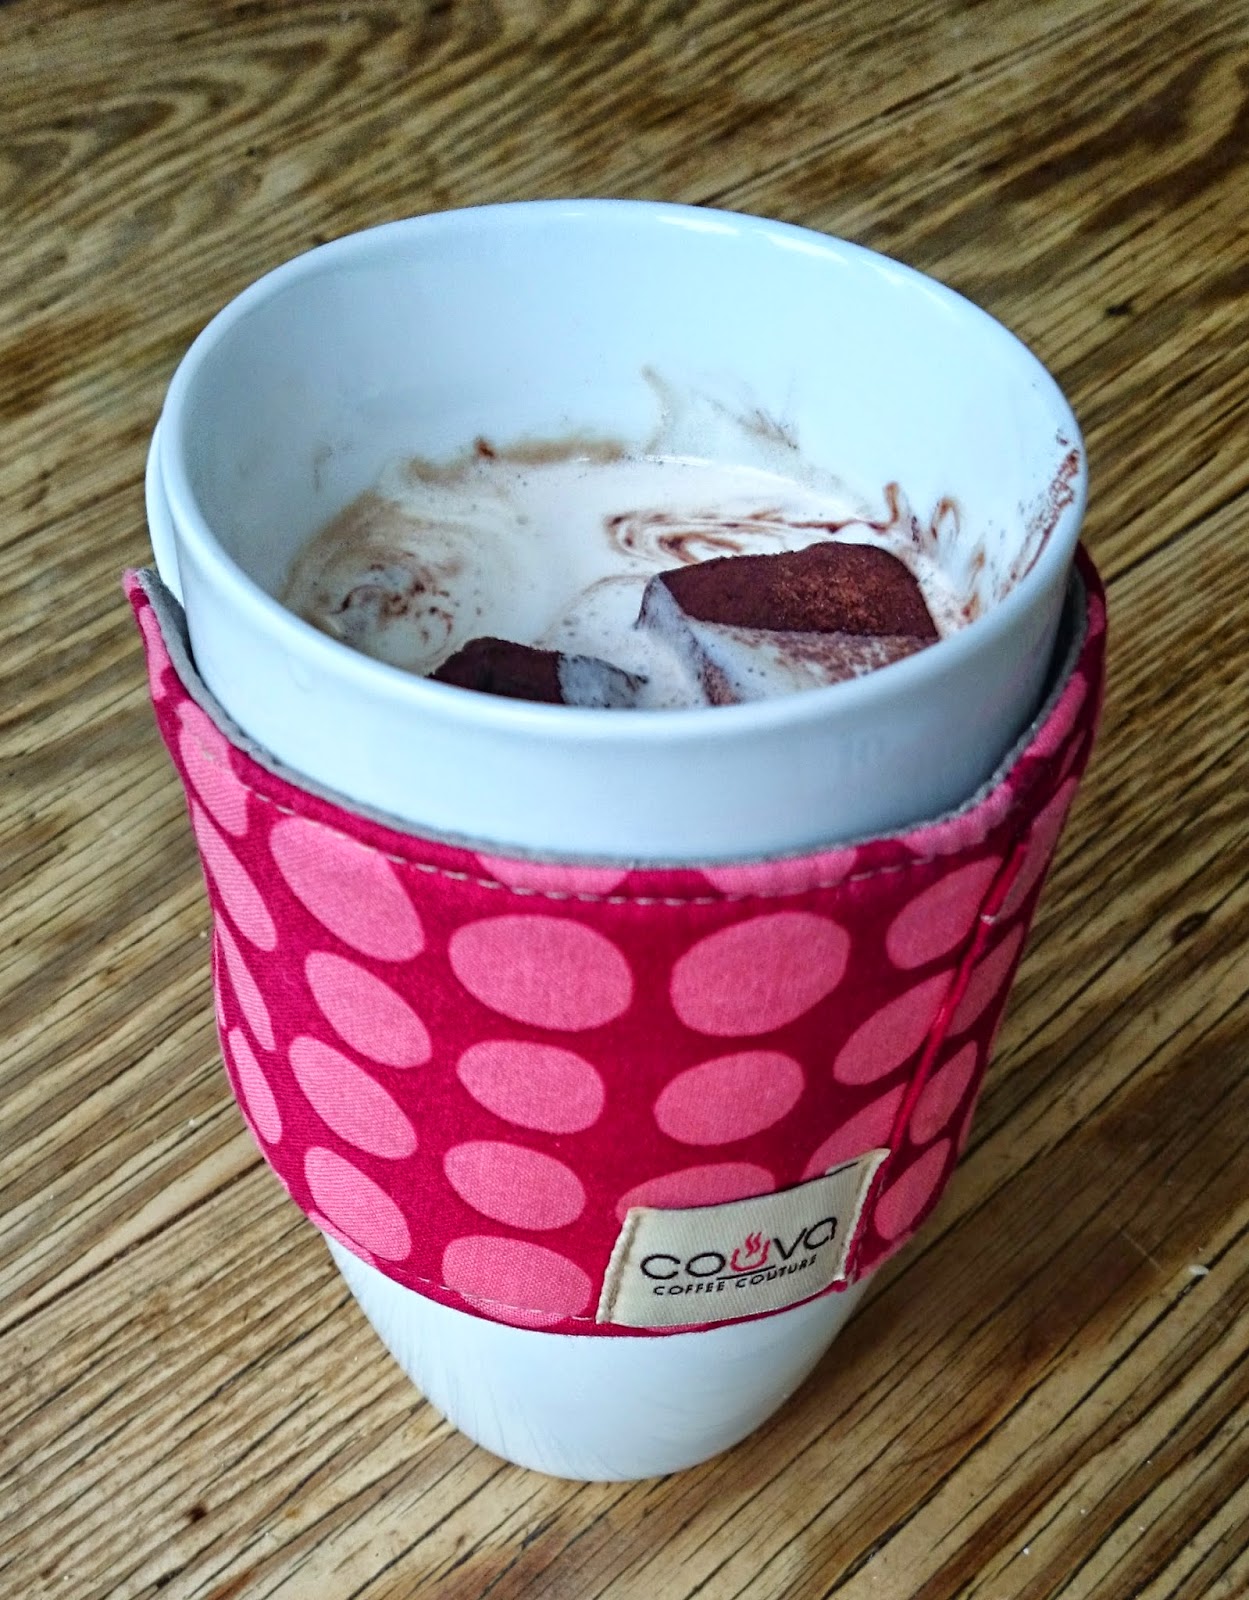
Copyright Couva


Hot Chocolate

  • 4 mugfuls of milk (we use semi-skim in our house, but you could use full-fat milk for a really indulgent treat!)
  • 4 tablespoons of chocolate Ovaltine (any other chocolate milk powder would work too!)
  • 1 x 100g bar of Lindt Excellence Creamy Milk Chocolate OR Lindt Excellence 85% Dark Chocolate (if you like it a bit more intensely chocolate and slightly more bitter)
    (*you can use any other kind of milk or dark chocolate that you have available, but I have to say that Lindt is my favourite!  I've also used Cadbury's, Sainsbury's brand, etc... But just make sure that they are 100% PURE chocolate without any funny additives)
  • Vanilla Whipped Cream (see below)
  • Marshmallows
  • Chocolate shavings or more chocolate Ovaltine for sprinkling
  1. Warm up the milk over medium heat until there is steam coming up from the top of the milk, but be careful that it doesn't come to a boil. 
  2. Sprinkle in the Ovaltine and carefully drop in the pieces of your chocolate bar. 
  3. Grab a whisk or wooden spoon and stir continuously until all of the chocolate melts. You want to try and keep the chocolate moving once you first put it into the hot milk so that it doesn't stick to the bottom of the pan and burn. 
  4. Remove from heat and pour into 4 mugs.
  5. Garnish with a few dollops of gorgeous Vanilla Whipped Cream (see below), a few marshmallows and a sprinkle of some chocolate shavings or some chocolate Ovaltine powder. 
  6. Enjoy! (and trust me - you will!!)

Vanilla Whipped Cream
  • 150 ml double or whipping cream
  • 2 teaspoons vanilla extract (try to use a good quality, pure vanilla if you can)
  • 2 teaspoons of sugar

  1. Mix together the cream, vanilla extract, and sugar. 
  2. Whip on high until the cream starts to thicken. Be careful not to overwhip the cream or it will start to get clumpy, and clumpy cream just isn't nice! You want to stop whipping when you've got some soft peaks, but the cream mixture can still be easily stirred. 
This Vanilla Whipped Cream is amazing on all sorts of things - cafe latte, cappuccino, apple crumble, or even just a spoon!

*You can also use this Ultimate Hot Chocolate to make the most amazing Cafe Mocha. Simply fill your mug half-way up with the hot chocolate, and fill the rest with your favourite freshly-brewed coffee. Again, top it with some Vanilla Whipped Cream and chocolate shavings... You're going to love it! 

I'd also just like to say a few things about marshmallows. Nowadays, there are marshmallows and there are Marshmallows. You can buy your average pink and white ones from the supermarket, and they are pretty yummy. But if you are looking for a really over-the-top, decadent hot chocolate experience, may we suggest that you invest in some of the most amazing chocolate marshmallows you've ever tasted from Eat Toast Dunk Me. I promise you, they are well worth it! The heat of the rich, velvety, cream hot chocolate permeates the chocolate marshmallows, melting them ever-so slightly so that they become almost like little pillows of chocolate mousse that sit atop of the whipped cream. Seriously, all together, we are talking heaven in a mug! 


And what better way to keep your Ultimate Couva Hot Chocolate at the right temperature for longer? A Couva Cup Cover of course!! The covers make a great gift... You can get one here: www.couva.co.uk/shop.html


Imagine giving a hot chocolate gift pack to a loved one?! A mug, a Couva Cup Cover, a bar of Lindt Chocolate, some Eat Toast Dunk Me chocolate marshmallows, and the recipe for our Ultimate Hot Chocolate - it would make anyone very happy!


Keeps your coffee (*or hot chocolate!!) hotter for longer! 


Sunday, 25 May 2014

The BEST no-bake chocolate cheesecake


I don't know about you, but I love cheesecake. I love all kinds of cheesecake - plain vanilla ones, cheesecake with fruit on top, chocolate cheesecake,... you name it, I like it.
But I have to say that one of my absolute favourites is one that I make from a recipe by Martha Stewart. Her "No-bake Chocolate-Crust Cheesecake" is divine!
It's got a gorgeous texture to the filling - light, almost mousse-like. The other thing that I love is how easy it is to make. I think my record so far is 15 minutes - start to finish!


The other day, my loved ones and I had been invited to a BBQ with friends, and I had been tasked with making dessert. I asked my little one what I should make, and straight away he answered "chocolate cheesecake".
A traditional cheesecake takes time - the mixing, the baking in a water bath at low temperature, and the resting.... Time I didn't have after  a long day at work.
So, in my haste, I made something up that turned out to be pretty fantastic, if I do say so myself. (Well, so did the other taste-testers!!).

I basically took Martha's recipe, added a few things, changed some other things, and ended up with a gorgeous No-bake Chocolate Mocha Mousse Cheesecake that is to die for!!

With the bank holiday this weekend, it is the perfect dessert to make - it's quick and easy, no oven is required, and it pleases the masses (big and small!).

I hope you enjoy it as much as we did!


Photo Credit: Martha Stewart Omnimedia

No-bake Chocolate Mocha Mousse Cheesecake


  • For the crust:
  • - 7 ounces chocolate biscuit crumbs (*If you don't have access to store-bought biscuit crumbs, simply whizz up some chocolate digestives, some Oreo cookies, or some Bourbon biscuits)
  • - 3 tablespoons sugar
  • - 6 to 8 tablespoons unsalted butter, melted
  • 1. Place biscuits in a food processor; process until finely ground. If you don't have a snazzy food processor, you can get the same effect by getting the days' frustrations out by putting the biscuits in a plastic zip bag, and bashing them to smithereens! 
  • 2. Mix the biscuit crumbs and 3 tablespoons sugar in a bowl. Add 6 tablespoons of melted butter, and mix well until crumb mixture holds together. You don't want the mixture to be too dry, so add a bit more butter if it needs more moisture.
  • 3. Press the crumb mixture into the bottom of a pie plate, preferably a spring-form pan (about 6 inches/ 15 cm). Press the mixture down, lining the bottom and half-way up the sides of the pan. (*Helpful tip! Use the back of a large spoon or the base of a measuring cup to help press and smooth out the crumbs). Put the prepared crust in the freezer while making the filling. 
  •  
    • For the filling: 
  • - 1 packet cream cheese (about 250g), softened
  • - 1/3 cup granulated sugar
  • - 1 tsp vanilla extract (make sure it's a good one!)
  • - 1/2 cup double or whipping cream
  • - 1/4-1/2 tsp instant coffee granules, dissolved in 1/2 tsp hot water
  • - 150g dark chocolate, melted and cooled slightly

  • 4. Mix together the cream cheese, granulated sugar, vanilla, and dissolved coffee until well combined. In a separate bowl, whip the cream until soft peaks form. Fold this gently into the cream cheese mixture.  Lightly whip cream to soft peaks, and fold into cream-cheese filling. Slowly mix in the melted chocolate, folding it in carefully to make sure to keep as much of the fluffiness of the whipped cream as possible.
  • 5. Pour the filling into the prepared biscuit crust, smoothing down the top. Place into the fridge for at least 30 minutes to set before serving. 

  • To serve:
  • - 50g dark chocolate, melted
  • - 1 pint fresh raspberries 

  • 6. Using a fork, drizzle on the melted chocolate. Serve with fresh raspberries. 
    • (*If you don't have fresh raspberries available, you can also use frozen raspberries. Take 1 cup of frozen raspberries with 2 tbsp of sugar, and warm them in the microwave or on the stovetop. Serve with the cheesecake as a sauce). 


Another way to make this is in individual portions. Place the filling mixture into individual glasses (martini or wine glasses are perfect for this!) and sprinkle the tops with the biscuit crumbs. Then pour the raspberry sauce and fresh raspberries on the top! 


Monday, 24 March 2014

Nigella's quick chocolate mousse with a Couva twist!

Photo credit
On Saturday night, we had some friends round to ours for supper. About 7 years ago, this would have meant a lovely quiet evening, some candles, nice wine, linen table cloth and napkins. I would have thought through a menu with a plated starter, a main course that consists of different complimentary elements, a pudding that was lovingly crafted (ok, maybe by M&S but still....!), followed by coffee, liqueurs, and possibly some delicious chocolates. 

This was not our Saturday night. 

At 5:30pm, our friends and their 2 boys (aged 6 and 3) arrived with a clang and a shout through the letter slot. They traipsed in, coats and shoes flying (by the 6 and 3 year-olds), and a murmur of apology from the parents. Our 6 year old came clomping from his bedroom upstairs, jumped onto the banister and slid down (his new favourite mode of transport - stairs are "so" last week!), almost taking out 2 of the adults in the process. Not to mention, introducing the 2 visiting boys a new way of potentially killing themselves while visiting our home. 


Photo credit
Instead of the menu plan that I described above, the plan for Saturday night was more about making sure that little people had enough to eat of as many of the main food groups as possible with the minimum amount of arguing, tears, bribery, and food-flingage. 
We started with crisps... yes, our starter was crisps. They were the snazzy kettle-cooked ones, but they were still crisps. For the adults, I really went all out with some shop-bought hummus. 

After a lot of discussion and rearranging (imagine, if you will, something like human tetris around a dining room table!) we finally sat down and I served big platters of pasta (with just a bit of butter, just to be on the safe side!), chicken cacciatore with lovely chunks of roasted red peppers, onions, olives all swimming in a delicious tomato-ey sauce, garlic bread, a big crunchy salad, and a big bowl of cucumber (because when all else fails with kids, give them cucumber!). 

Generally speaking, it was a success! For my son, who hates when different foods touch on his plate, he successfully kept the pasta, the cucumber, the bread and the pieces of chicken sufficiently separated. For the other 6 year-old, I got an 'almost thumbs up' for the chicken and the garlic bread who told me that the garlic bread was"not nearly as good as they serve at school, but it's pretty ok"... I'm taking that at the highest praise possible from a 6 year-old boy! 
And the 3 year old only climbed on the table once, and fell sideways off his chair twice - neither time a result of trying to avoid an incoming mouthful. 

As for the grown-ups, seconds and thirds were had by all. 

But the real winner of the evening was pudding. These days, I'm all about making the minimal amount of effort... there just isn't enough time anymore to slave over recipes that require a multitude of steps or close monitoring.
So I chose a recipe I have used a number of times before with great success... Nigella's Instant Chocolate Mousse. But I gave it a little something extra - Couva style! I added some instant espresso coffee powder that I diluted in a teaspoon of water. The result was out of this world! The coffee lifted the flavour of the chocolate, intensifying the richness. So delicious! 

The ingredients might put some people off, but really, all the bits come together in a deliciously gorgeous mixture that will please anyone. I really urge you to try it! 
Let's just say, that it was the only time all of Saturday evening that all 3 boys sat still and quietly for longer than 5 minutes! 


makes about 4-6 servings (or 2-3 for very greedy people!)

Ingredients

1/4 cup (60 ml) hot water
1/2 to 1 tsp instant coffee (use more or less depending how much you want to taste the coffee)1 1/2 cups (150 grams) mini marshmallows (you can use big marshmallows, but cut them into small pieces)
1/2 stick (50 grams) soft butter
9 oz good dark chocolate, chopped into small pieces 
1 cup (284 ml) double cream
1 tsp vanilla extract

Method

  1. Mix the instant coffee into the hot water. 
  2. Put the marshmallows, butter, chocolate, and coffee-water mix in a saucepan.
  3. Place the pan over low-medium heat, to melt all the ingredients together. Give it a stir every now and then to help to melt everything evenly. Once its all melted into a smooth glossy mixture, take it off the heat to let it cool.
  4.  In a separate bowl, whip the cream with the vanilla extract until it's thick. 
  5. Once the chocolate mixture has cooled slightly, fold in the whipped cream, mixing it until you have a lovely smooth mixture. 
  6. Pour the chocolate cream mixture into glasses, small pots (about 1/2-3/4 cup for each), or into one large bowl. Put it in the fridge to set until you're ready to enjoy it!

    When you're ready to serve it, you could add an extra dollop of whipped cream, 
    some chocolate curls, a sprinkle of coffee powder, or even a few chocolate covered coffee beans.
    Enjoy!
Couva Coffee Couture... stylish wear for your cafétière!
www.couva.co.uk